🛡️ Managing Permission Levels
ACENji offers a flexible role management system designed for both global roles and location-based permissions using a structured concept called Levels.
Global roles are created and managed at the organizational level, outside of any specific app. These roles define what a user can do across the entire ACENji platform—such as managing users, configuring settings, or accessing reports.
To further support large or distributed organizations, ACENji allows you to define an security entity called Levels. There could be up to 12 static Levels for assigning permissions based on location, department, or any hierarchy you choose.
These Levels are fully customizable and allow your team to reflect the unique structure of your organization.
🧭 Example: A healthcare organization might use its Levels like this:
- Level 1: State
- Level 2: County
- Level 3: City
- Level 4: ZIP Code
- Level 5: Building
- Level 6: Wing
- Level 7: Floor
- Level 8: Room
- Level 9: Bed
(Levels 10–12 remain available for even more precision if needed)
Each role can then be assigned permissions based on one or more Levels—for instance, granting a supervisor access to all rooms on a particular floor in a specific building.
🖼️ A visual representation of how Levels work will be shown below.
This section focuses on defining these global roles and level-based permissions.
If you want to assign permissions within a specific app, workflow, or dataset, continue to the next section on App-Level Permissions.
🧱 Defining Levels
Before assigning location-based or hierarchy-based permissions to a role, you must first define the Levels that reflect your organization’s structure.
ACENji allows you to define up to 12 static Levels, which can represent anything from geographic regions to organizational units—such as:
- States
- Regions
- Cities
- ZIP Codes
- Departments
- Buildings
- Floors
- Rooms
- Any other category relevant to your operations
🔧 These levels are fully customizable and do not follow a fixed pattern. You define what each level means.
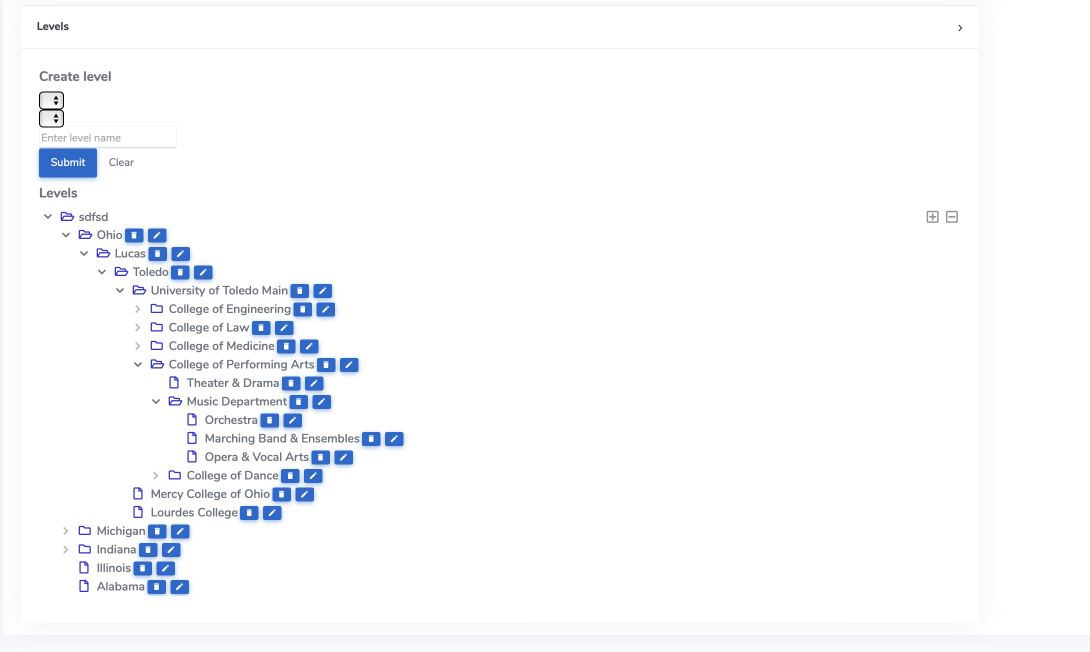
➕ How to Create Levels
To define Levels in your workspace:
- Navigate to:
Dashboards → Account → Admin → Levels - Click Create Level
- Name your level (e.g., "Building", "Region", "Team Zone")
- Save — your level is now available for role assignments and staff access controls.
📌 You can create up to 12 levels in total. The order you create them in defines their hierarchical position (Level 1 to Level 12).
👥 Associate Staff with Levels
Once your Levels are defined, you can associate individual users or staff members with their respective levels:
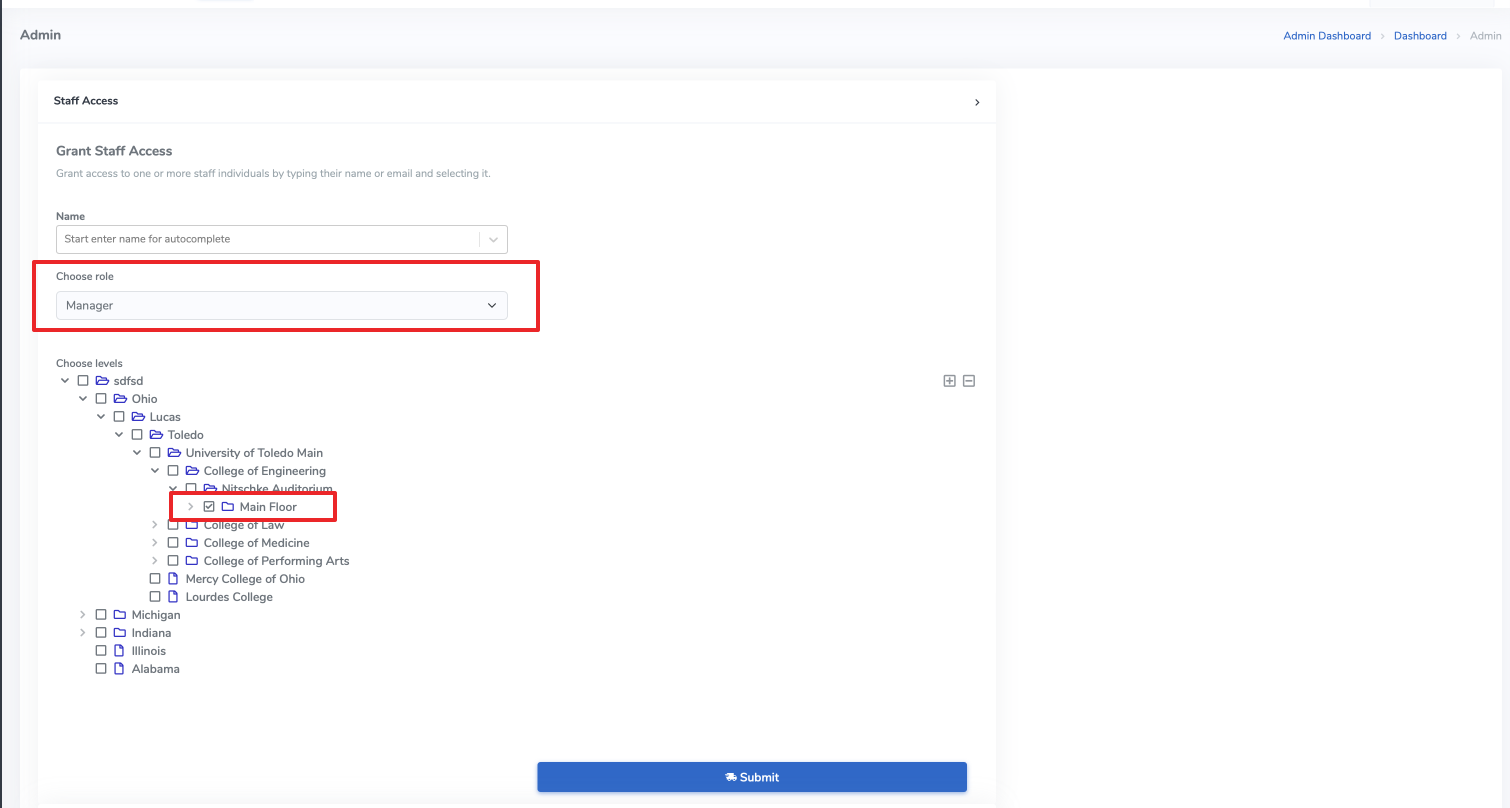
- Navigate to:
Dashboards → Account → Admin → Staff Access - Select a staff member
- Assign them to the appropriate level(s) — for example, a building manager may be assigned to:
- Level 1: State - Michigan
- Level 2: City - Grand Rapids
- Level 5: Building - Central Admin Tower
- Save changes — the staff member now has permissions scoped to those levels.
📘 Once Levels are set and assigned, you can apply them in your role definitions to control what users can do and where.
Need Help?
Start your journey at ACENji's NoCode Platform — accessible on both web and mobile browsers. Our intuitive interface helps you ease into building apps without needing any prior technical experience. If you have any questions or need help at any point, our team is here for you.
Feel free to reach out to us — we’re happy to assist.
If you have any questions, please don't hesitate to contact us.
Questions?
If you have any questions, please don't hesitate to contact us.
Alternatively, you can submit an issue on this platform.
Useful Links:
ACENji Sign Up - https://help.acenji.com/#/../../getting-started/signup/index
ACENji Elements - https://help.acenji.com/#/./elements/index
Quick Start Conditional Logic - https://help.acenji.com/#/./conditional-logic/quick-start/index