🧩 WordPress Integration
ACENji can be added directly into your existing WordPress website — without changing your current pages or design.
You’ll build your web application inside ACENji (with all its pages, tiles, workflows, and logic) and then simply connect it to WordPress using our plugin.
This lets your users access your ACENji app inside your own domain, as if it were a natural part of your site.
🪄 Step 0 — Set Display Mode and Download the Plugin
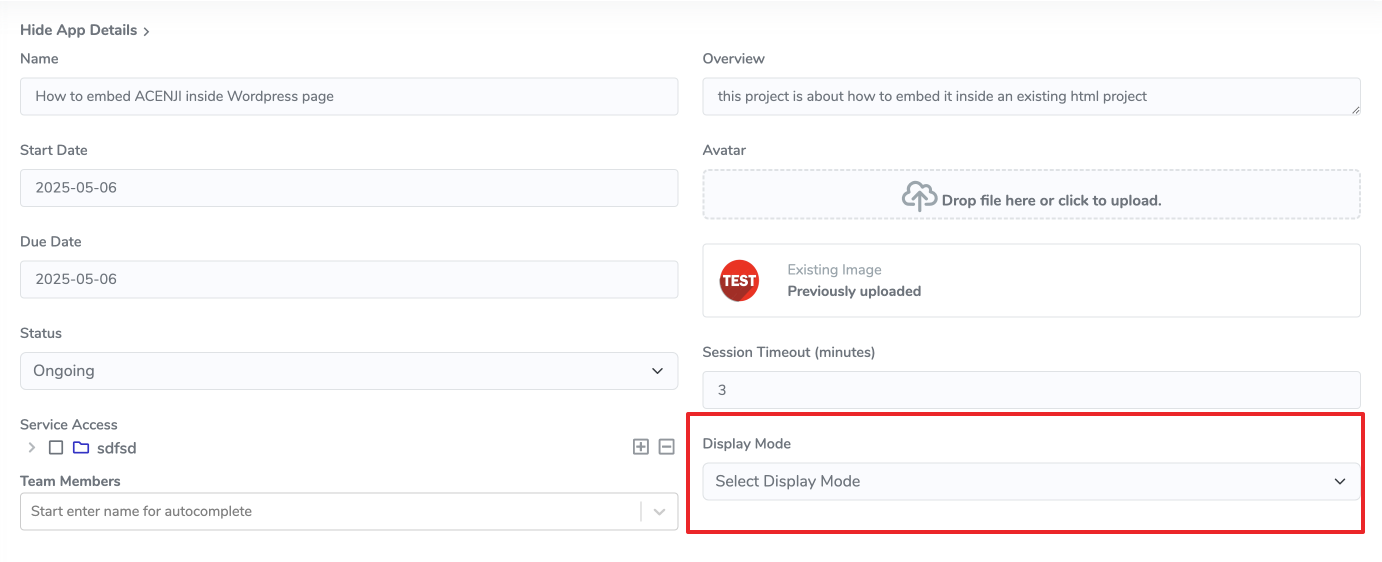
Before integrating ACENji with WordPress, you’ll first enable the correct display mode from within your ACENji dashboard.
- Go to your ACENji project’s App Details screen.
- Find the Display Mode dropdown.
- From the list, select “WordPress (with Authentication)”.
Once selected, two new options appear:
- A Download WordPress Plugin button (to get the latest version of the plugin)
- A link to the tutorial (“Integrating with WordPress”) for reference
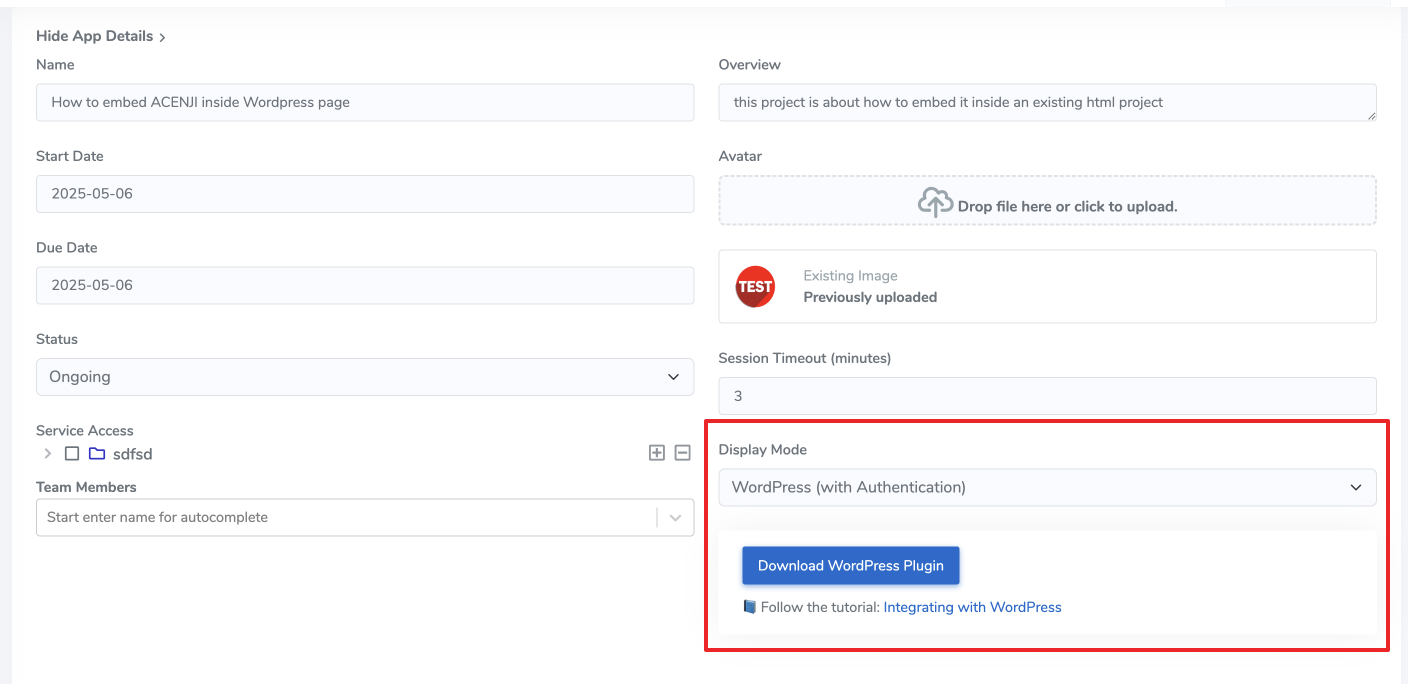
Click Download WordPress Plugin — this will download a ZIP file (e.g. acenji_wp_plugin.zip) that you’ll install in your WordPress dashboard in the next step.
🪛 Step 1 — Download and Install the ACENji Plugin
You can get the ACENji WordPress plugin in two ways:
- From the official WordPress Plugin Directory
- Or by requesting it directly from us at ACENji.com
Once you have the plugin file (acenji_wp_plugin.zip):
- In your WordPress dashboard:
- Go to Plugins → Add New
- Click Upload Plugin
- Upload the
acenji_wp_plugin.zipfile - Click Install Now then Activate

⚙️ Step 2 — Confirm the Plugin is Installed
- Go to Plugins → Installed Plugins
- You’ll see the plugin listed under “ACENji Tech Solutions” with its version and description
This confirms it’s active and ready to connect to your ACENji project.
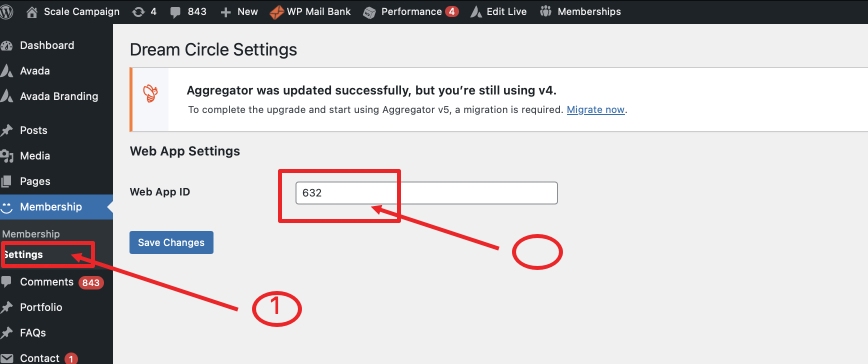
📝 Step 3 — Enter Your ACENji Project ID
Each project you create inside ACENji has a unique ID.
You’ll find it in the project URL inside your ACENji dashboard.
Example:https://www.acenji.com/admin/dashboard/visitors/643/web-card-builder
In this example, the number 643 is your project’s ID.
- Copy this number
- In WordPress, go to Settings → Membership Settings
- Paste your ACENji Project ID into the field provided
- Click Save
🔐 ACENji uses strong authentication and authorization.
Exposing the ID is safe and does not affect security.
🧭 Step 4 — Add ACENji to Your Site Menu
The simplest way to give your users access to your new ACENji-powered app is to add it to your WordPress navigation menu:
- Go to Appearance → Menus
- In the Available Links list, you will now see your ACENji site listed
- Select the ACENji link and Add it to your menu
- Save the menu
Now your site has a direct link to your ACENji app.
🚀 Step 5 — Test the Experience
- Visit your WordPress site as a regular user
- Click the ACENji menu link you added
- A login screen will appear seamlessly inside your WordPress page
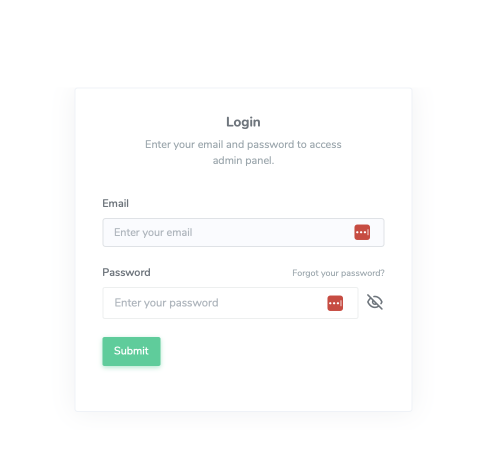
Once logged in, users are taken straight into your ACENji application — all within your own site’s layout and domain.
💡 This creates a seamless experience where users feel your ACENji app is part of your website — not a separate system.
✅ That’s it!
Your ACENji web application is now live inside your WordPress site.