Info Element
Information elements can be used in both Forms and Cards. They are one of the simplest building blocks available in ACENji. This type of element is often used to display informational text or labels on a web page. It's important to make sure that the text is easily readable and not too small or crowded. You may also want to consider using different font sizes, colors, or styles to highlight important information or make it stand out. You can also add options to customize the background color or border of the element to match the design of the page.
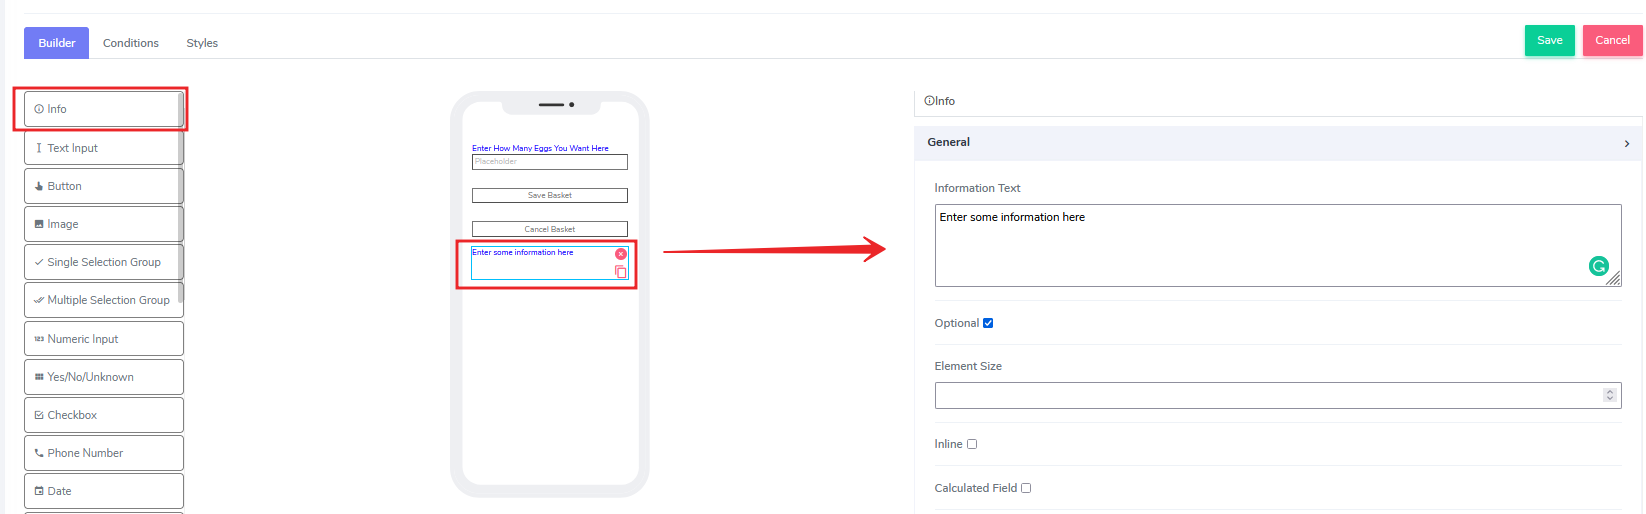
The Info element comes with the following attributes:
- Information Text: This is a freestyle, multi-line text field. It is read-only, meaning users cannot edit the text.
Information can be added to this field at design time or at run time using the calculated field function (see below). - Optional: By default, this element is optional, meaning users can skip it if they choose.
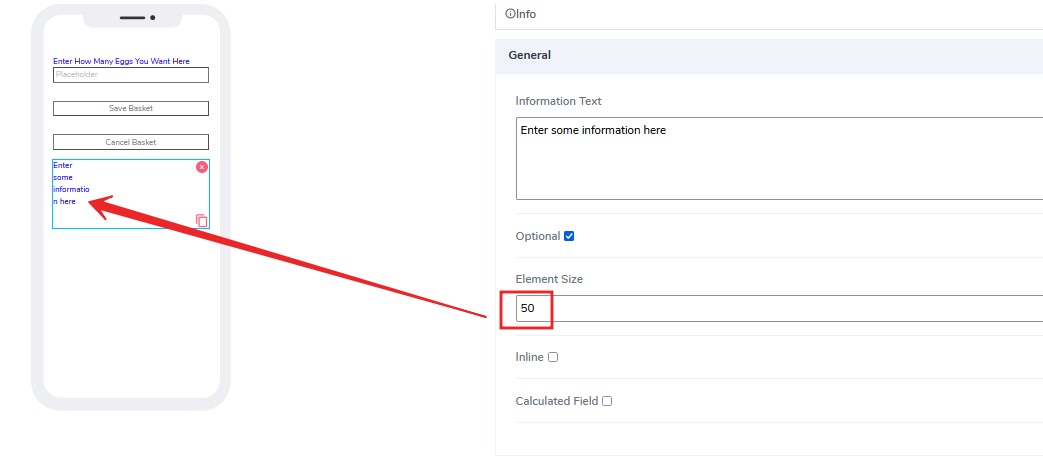
- Element Size: This field is empty by default. Users can add a numerical value (in pixels) to indicate the size of the info message. The smaller the size, the more lines will be allocated to the text in order to fit it into the specified box on the canvas.
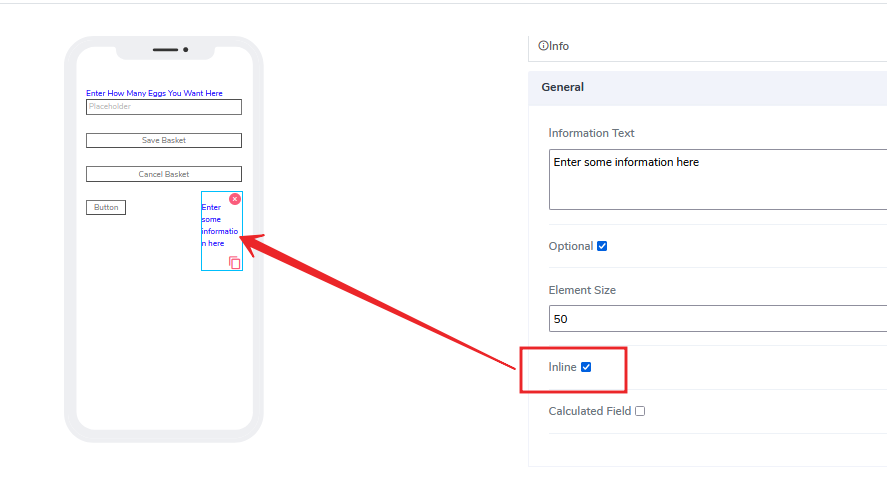
- Inline - "Inline" is a handy feature where if selected, the element will stick to the previous element on the canvas. If there is no space available to add it to the previous element, it will position itself with its own dimensions at the beginning of the canvas on the same row, and the next element can be glued to it.
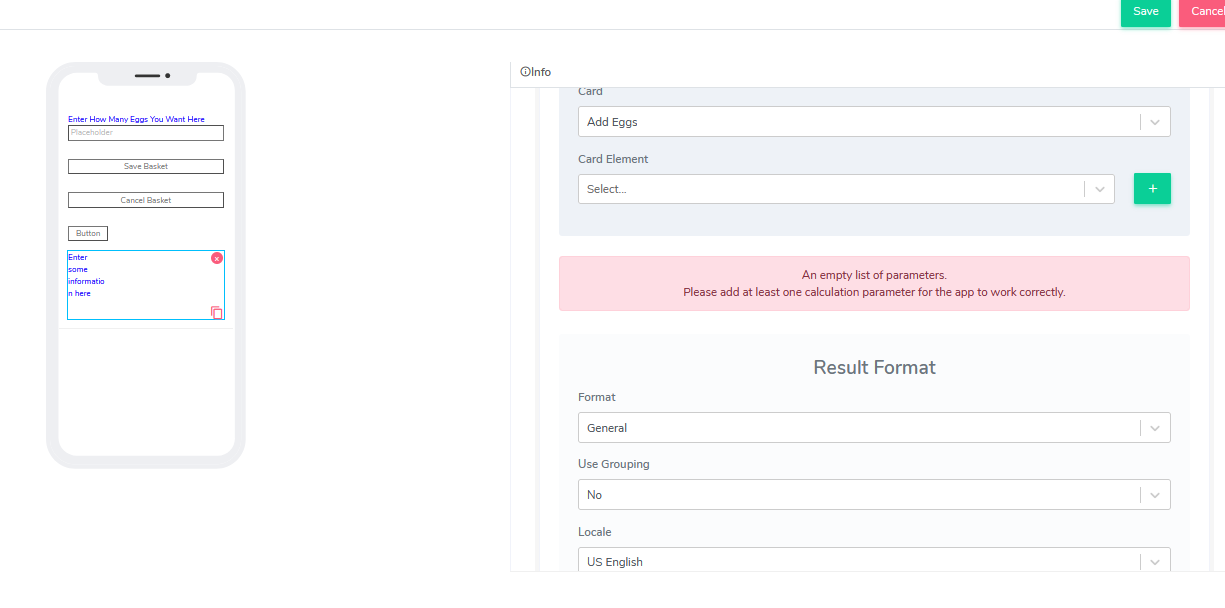
- Calculated Field - This option is not selected by default. If the user selects it, the following image will appear:
Imagine you have a magic tool that can take two things and put them together to make a new thing. For example, if you have a red ball and a blue ball, the magic tool can put them together to make a purple ball. That's kind of what the calculated field does in ACENji.
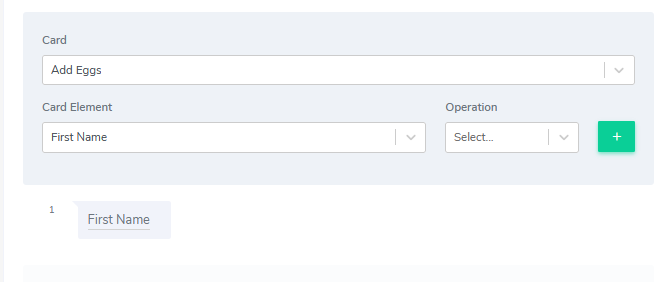
The idea here is to combine complex calculations using input information from the same or other cards. For example, let's add two text fields on the same card for simplicity: First Name and Last Name. The end result will be to display both names together inside the info element using the calculated field set up.
Select the card element 'First Name' and click the green + button.
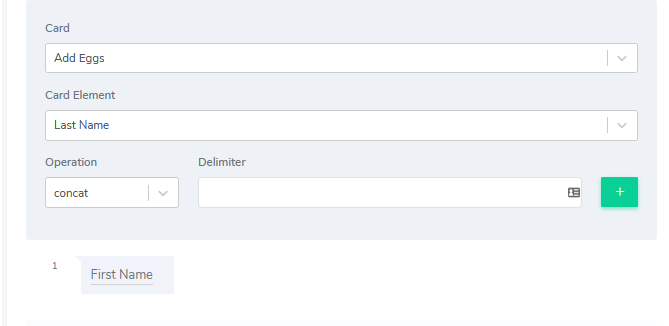
Next, we will select the element we want to use in the calculation: Last Name. Using the same drop-down where 'First Name' is currently selected, change it to 'Last Name' and this time select 'Operation'. The following operations are available:
- Plus
- Minus
- Multiply
- Divide
- Concat.
For our example, we will select "Concat". This will combine the value from the First Name and the value from the Last Name together as a result. A new field will show up called "Delimiter". Because we indicated that we will concatenate two string tokens, we need to also tell the platform how these two tokens will be joined together. For our example, let's add two empty spaces, so the result will be "First Last"."
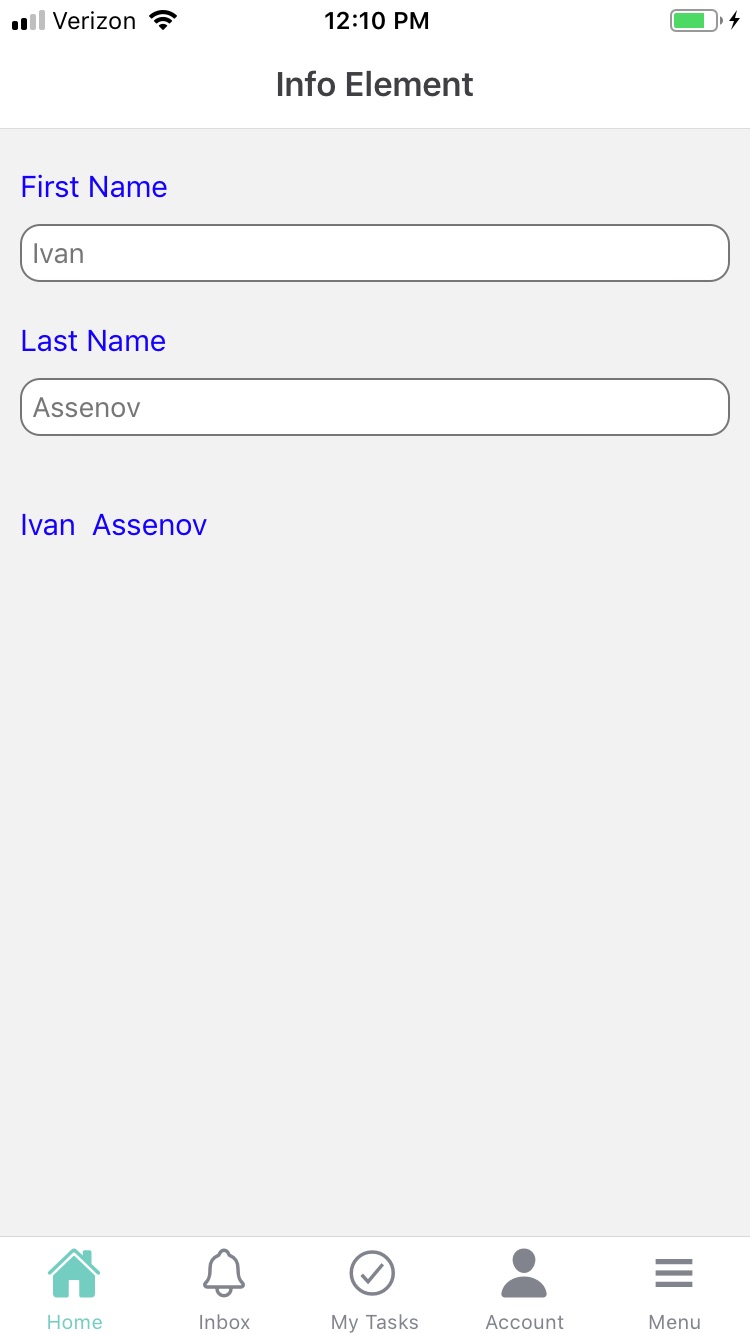
When we're done, the computer will put both names together for us, and we'll have a full name in one box.
After selecting the operation and specifying the delimiter, click the green "+" button again. This will create our first result. The idea is to have as many results as we want, all connected via some type of operation.
Since different cards and fields can participate in the calculation, the final result can be a very complex set of calculations.
Additionally, the calculation field is updated in real-time as data is inputted. So, for example, if the user adds the first name, the info field will display it.
Then, when the user adds the second part of the concatenated calculation (last name), it will be added to the calculation field.
Let's say you have a calculator that you use to add up numbers. You can use this calculator to add up different numbers and get the total. But what if you want to show the total in a different way, like with a dollar sign ($) or with two decimal points? That's where the "resulted format section" comes in.
The resulting format section has to do with how we display numbers. For example, let's calculate two numbers by adding them and assign them in currency format.
We will reuse the last card and add three additional elements: two input numeric number elements and one info element to show the result.
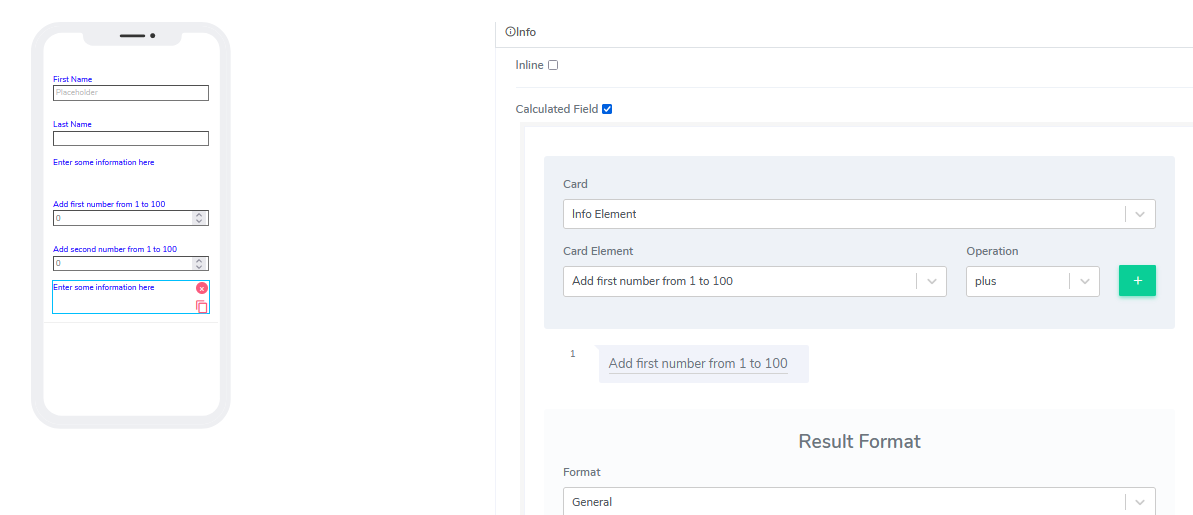
This time select "plus" from the operation and add the second number.
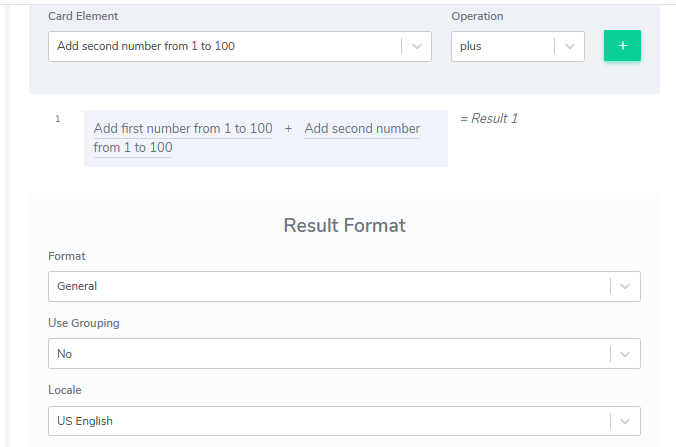
Let's add formatting. We will choose the "Currency symbol" option.
We can also use the "Use Grouping" option and select the "Locale" to indicate the supported language region. By default, we support US English.
Questions?
If you have any questions, please don't hesitate to contact us.
Alternatively, you can submit an issue on this platform.
Useful Links:
What is Single Selection Button? - https://help.acenji.com/#/./elements/single-selection-group/index
Using the GPS Element - https://help.acenji.com/#/./elements/gps/index
Using the Rating Element - https://help.acenji.com/#/./elements/rating/index